User management
IRIS+ Professional provides a user management system that allows you to create and manage users, assign roles, and set permissions. This is useful for controlling access to the system and ensuring that only authorized users can perform certain actions.
Go to Users.
Add user
Users are the individuals who have access to the system. Each user is assigned a role, which determines their permissions in the system. Users can be created and managed by a user with the Admin role.
The Admin role and full write access
Note that adding a user to a group having only Admin role does not grant them write access to all functionalities (as that role lacks access to some features, see above).
To have a user with full access to all functionalities, it must be assigned to a group with both Admin and Manager roles - the default "Administrator" user has full access. The Admin role is designed for the sole purpose of managing users and system settings.
- Click the Add button in the Users tab. This will open a form where you can enter the user's information, including their name, email address, and role.
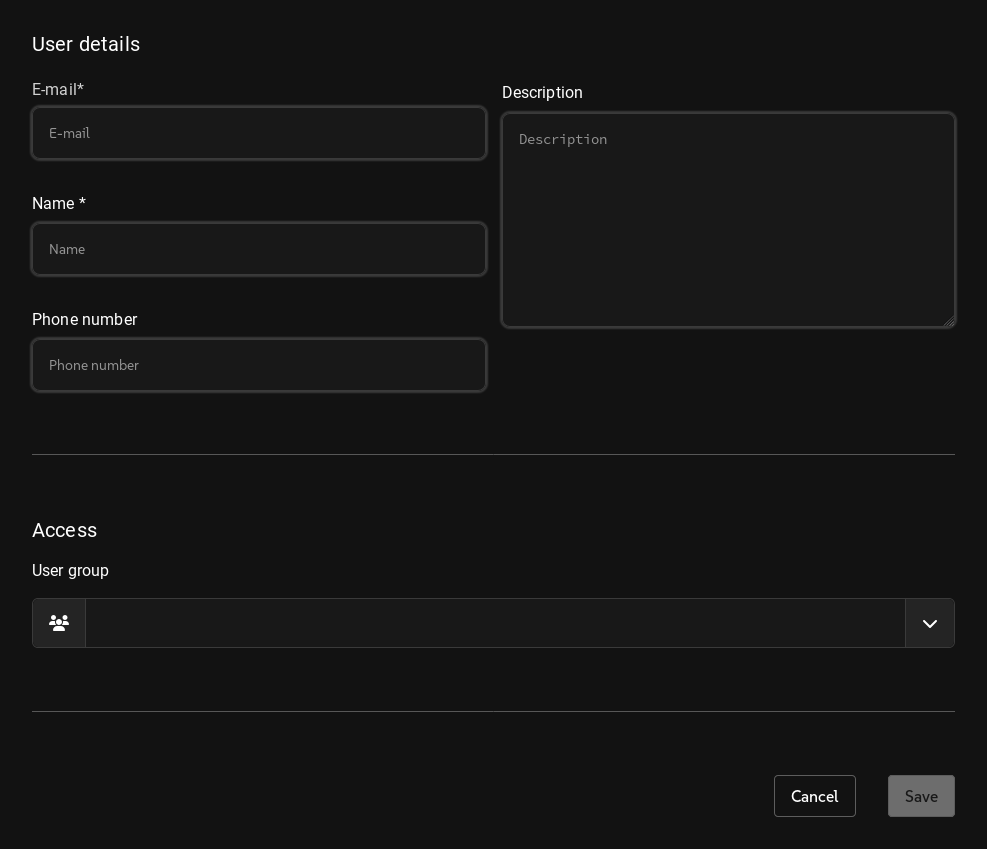
- Fill in the user details.
- E-mail: The email address of the user. This is used for sending notifications and alerts.
- Name: The name of the user. Used for identifying the user in the system. Automatically generated from the email address (otherwise changeable).
- Phone number (optional): The phone number of the user. This is used for sending notifications and alerts.
- Description (optional): A description of the user. This is used for identifying the user in the system.
- Click the dropdown menu to select the user group to which the user will belong. The user group determines the permissions that the user has in the system. A single user may belong to more than one group. The user group can be changed later.
Read below for more information about roles.
Click the Save button to create the user. Note that the user will only be created in the system; they will not be able to log in until they have been activated.
Activate user
-
Open the user by clicking their row in the Users tab.
-
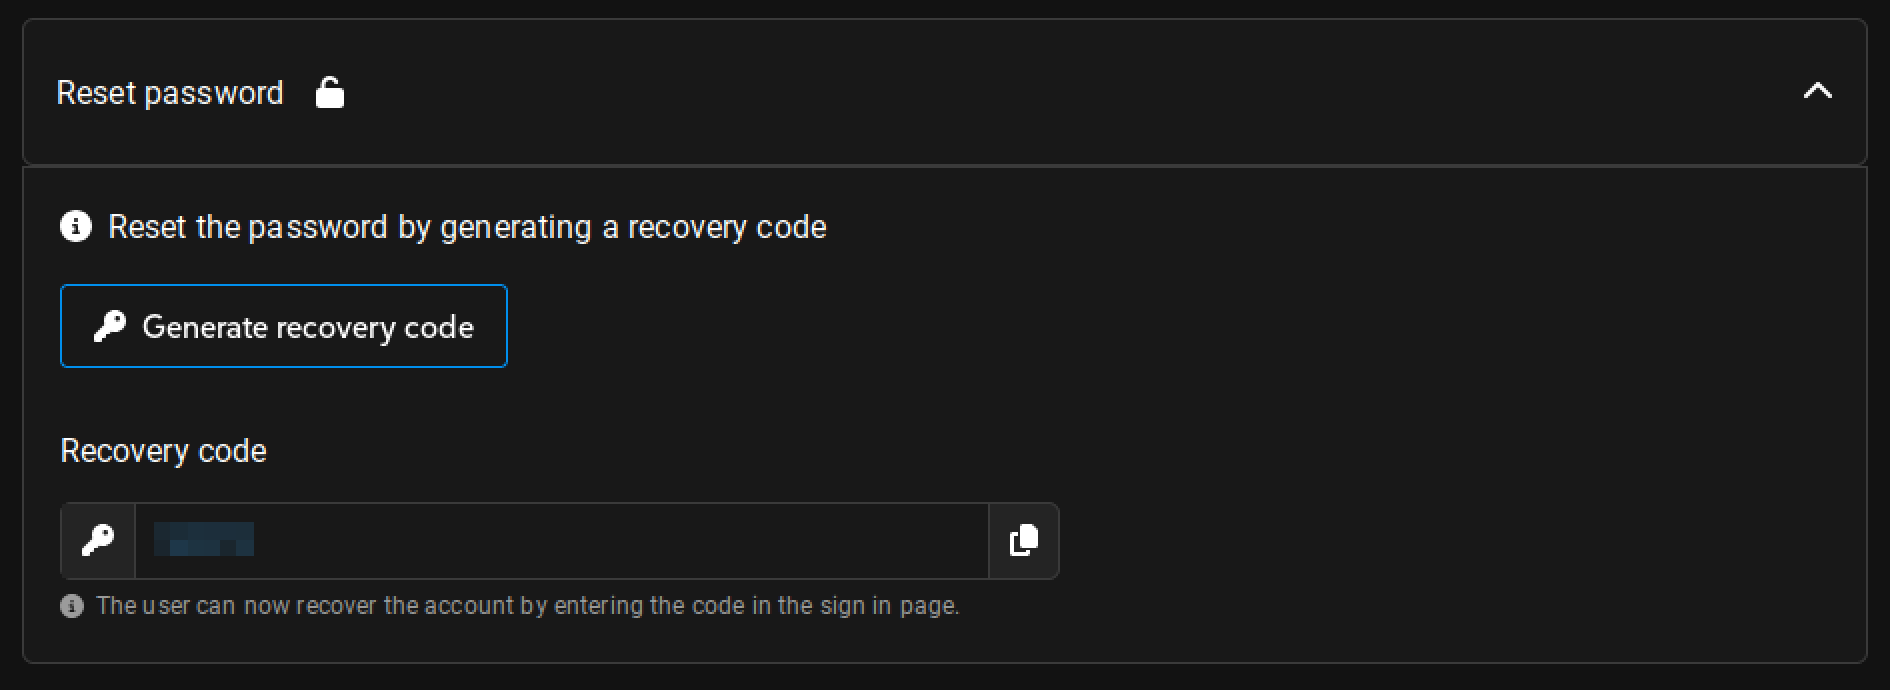
Expand the Reset password section. Click the Generate recovery code button. Copy the code to your clipboard. It is valid for 48 hours and can only be used once.
-
Send the recovery code to the user.
-
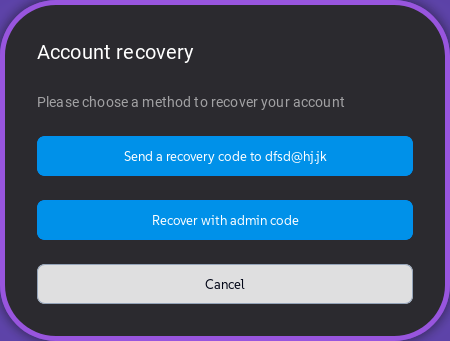
The user can then go to the login page and click the Forgot password link. They will be prompted to enter their email address.
-
After entering their email address, they will be presented with the following screen:
-
The user should click the Recover with admin code button and enter the recovery code that you sent them.
-
The user will then be prompted to enter a new password. After entering and confirming the new password, they can click the Reset password button to complete the process.
The user can now log in to the system using their email address and the new password.
Editing a user
To edit a user, click their row in the Users tab. This will open the above form where you can change the user's information (except for their e-mail).
Ticking the checkbox next to a user will enable additional functions; click the Delete button to remove the user from the system or Suspend to disable them. The user will not be able to log in to the system until they are re-enabled here.
Note that modifying the permissions of the user currently logged in will take between 1-2 minutes to take effect.
User groups
User groups are used to group users together and assign them the same permissions. This is useful for managing large numbers of users and ensuring that they have the same access to the system. User groups can be created and managed by the Administrator role.
-
Click the Add button in the User groups tab. This will open a form where you can enter the user's information, including their name, email address, and role.
-
Enter a name and description (optional) for the user group.
-
Select the permission level from the table to assign to the user group. You can select multiple permission levels for a single user group.
Read below for more information about permissions.
- Select the folder(s) accessible by the user group from the list.
Selecting the Workspace grants access to all folders.
- Click the dropdown menu to select the users to be added to the group. The user group determines the permissions that the user has in the system. A single user may belong to more than one group.
Click Save to create the group.
Roles and permissions
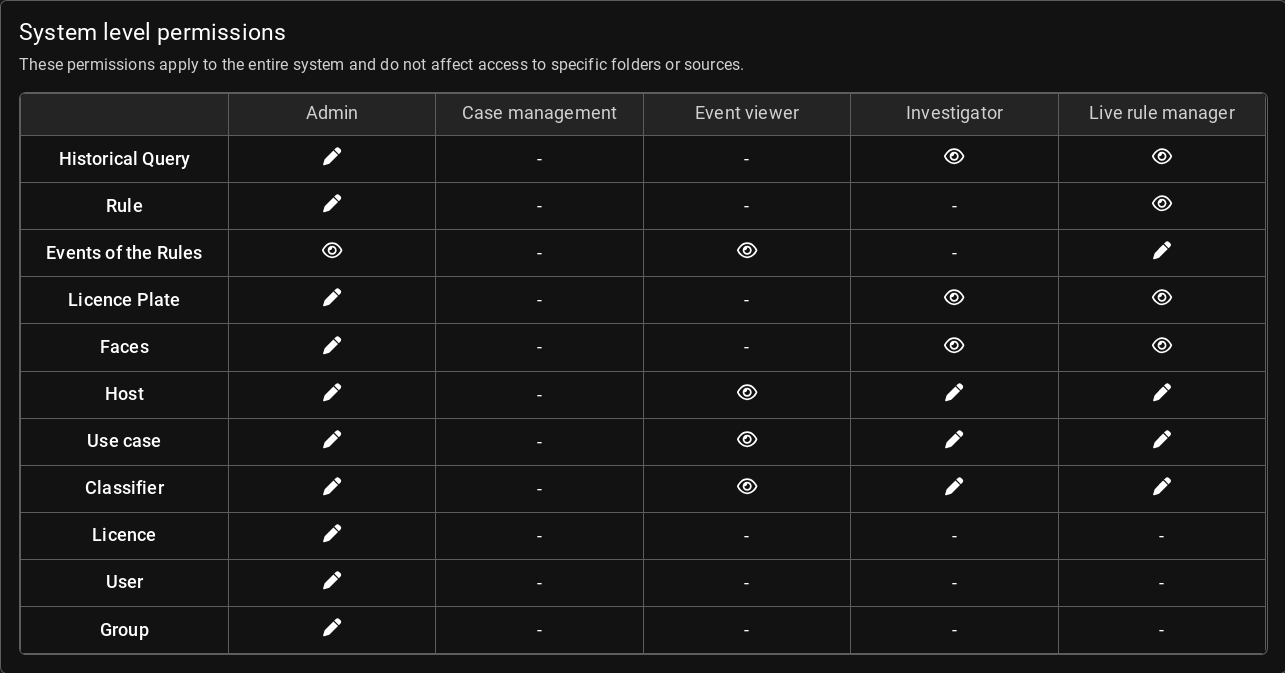
Roles are presets used to define the permissions that users have in the system. There are four predefined roles with different permissions:
The Event viewer role has read-only access to the system. This role can view live video feeds and historical data, but cannot make any changes to the system. The Viewer role is typically assigned to management personnel or auditors.
The Live rule manager role has access to running Queries, registering RTSP streams and uploading videos, as well as viewing system settings.
The Investigator role has access to running Queries, registering RTSP streams and viewing system settings.
The Administrator role can create and manage users and set permissions. It is able to upload Query Types and Classifiers, and has access to licence handling. It is unable to run Queries or register streams and videos. The Administrator role is typically assigned to system administrators or IT personnel.
See the table above for a detailed overview of the permissions for each role.